Content
Unlocking the Power of AI: Create Your Custom Chatbot in 10 Minutes
Unlocking the Power of AI: Create Your Custom Chatbot in 10 Minutes
Unlocking the Power of AI: Create Your Custom Chatbot in 10 Minutes
Danny Roman
November 9, 2024
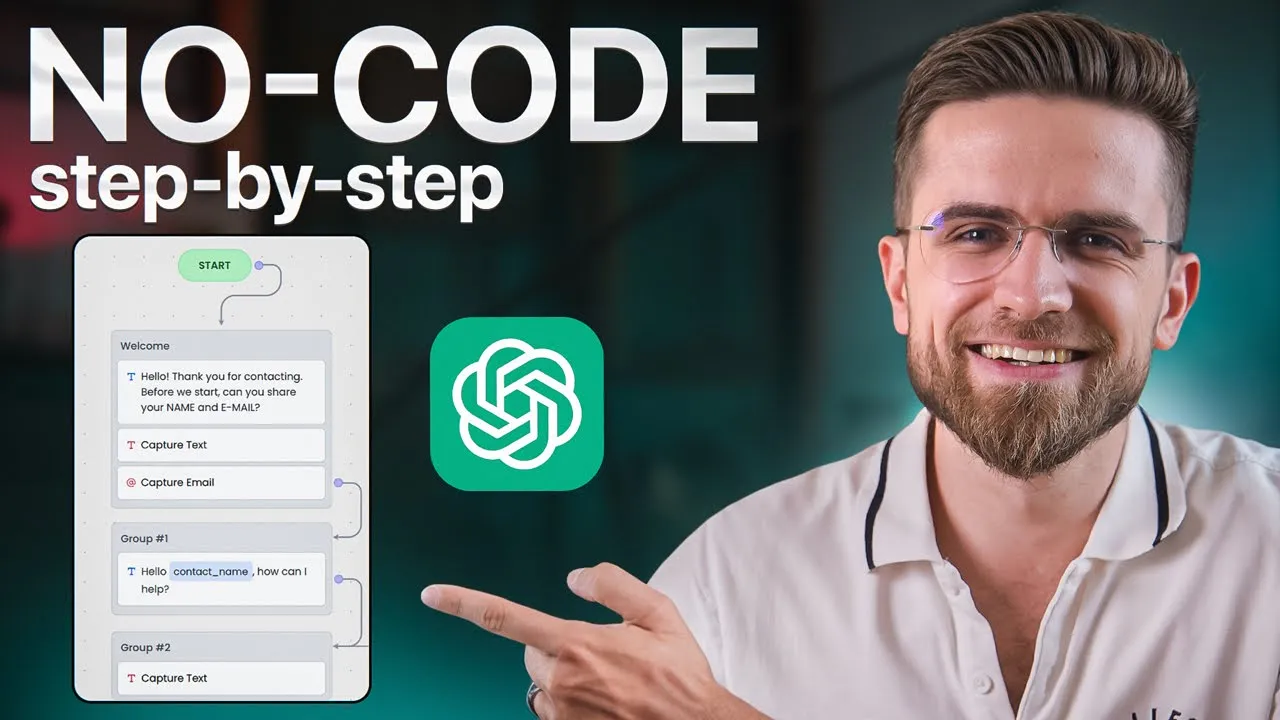


Ready to transform your website with a custom AI chatbot? In this blog, we'll guide you through a step-by-step process to build your very own chatbot using Chatling, making your site more interactive and user-friendly—all without a single line of code!
💻 Why Your Website Needs an Upgrade
Your website is your digital storefront. If it’s outdated, you’re losing potential customers faster than you can say “click away.” A fresh, modern look paired with interactive features can keep users engaged. Plus, who wants to be the brand with a website that feels like it’s stuck in the early 2000s?
Think about it: users expect instant answers and smooth experiences. If they land on a site that’s clunky or hard to navigate, they’re outta there! Upgrading your website with a chatbot not only enhances the user experience but also boosts your credibility. It’s about time you give your visitors what they deserve—a seamless, engaging experience that keeps them coming back for more.
🚀 Introducing Chatlink
Meet Chatlink, the game-changer in the world of chatbots! This platform is designed to empower you to create advanced AI chatbots without writing a single line of code. Yep, you heard that right! With Chatlink, you can build a chatbot that fits your unique business needs in under ten minutes. It’s like having your own personal assistant, available 24/7, ready to engage with your customers.
Why settle for basic when you can have advanced? Chatlink allows you to automate customer support, lead generation, marketing, and so much more. The best part? You can integrate it seamlessly into any website. So, whether you’re a small business or a large corporation, Chatlink has your back!
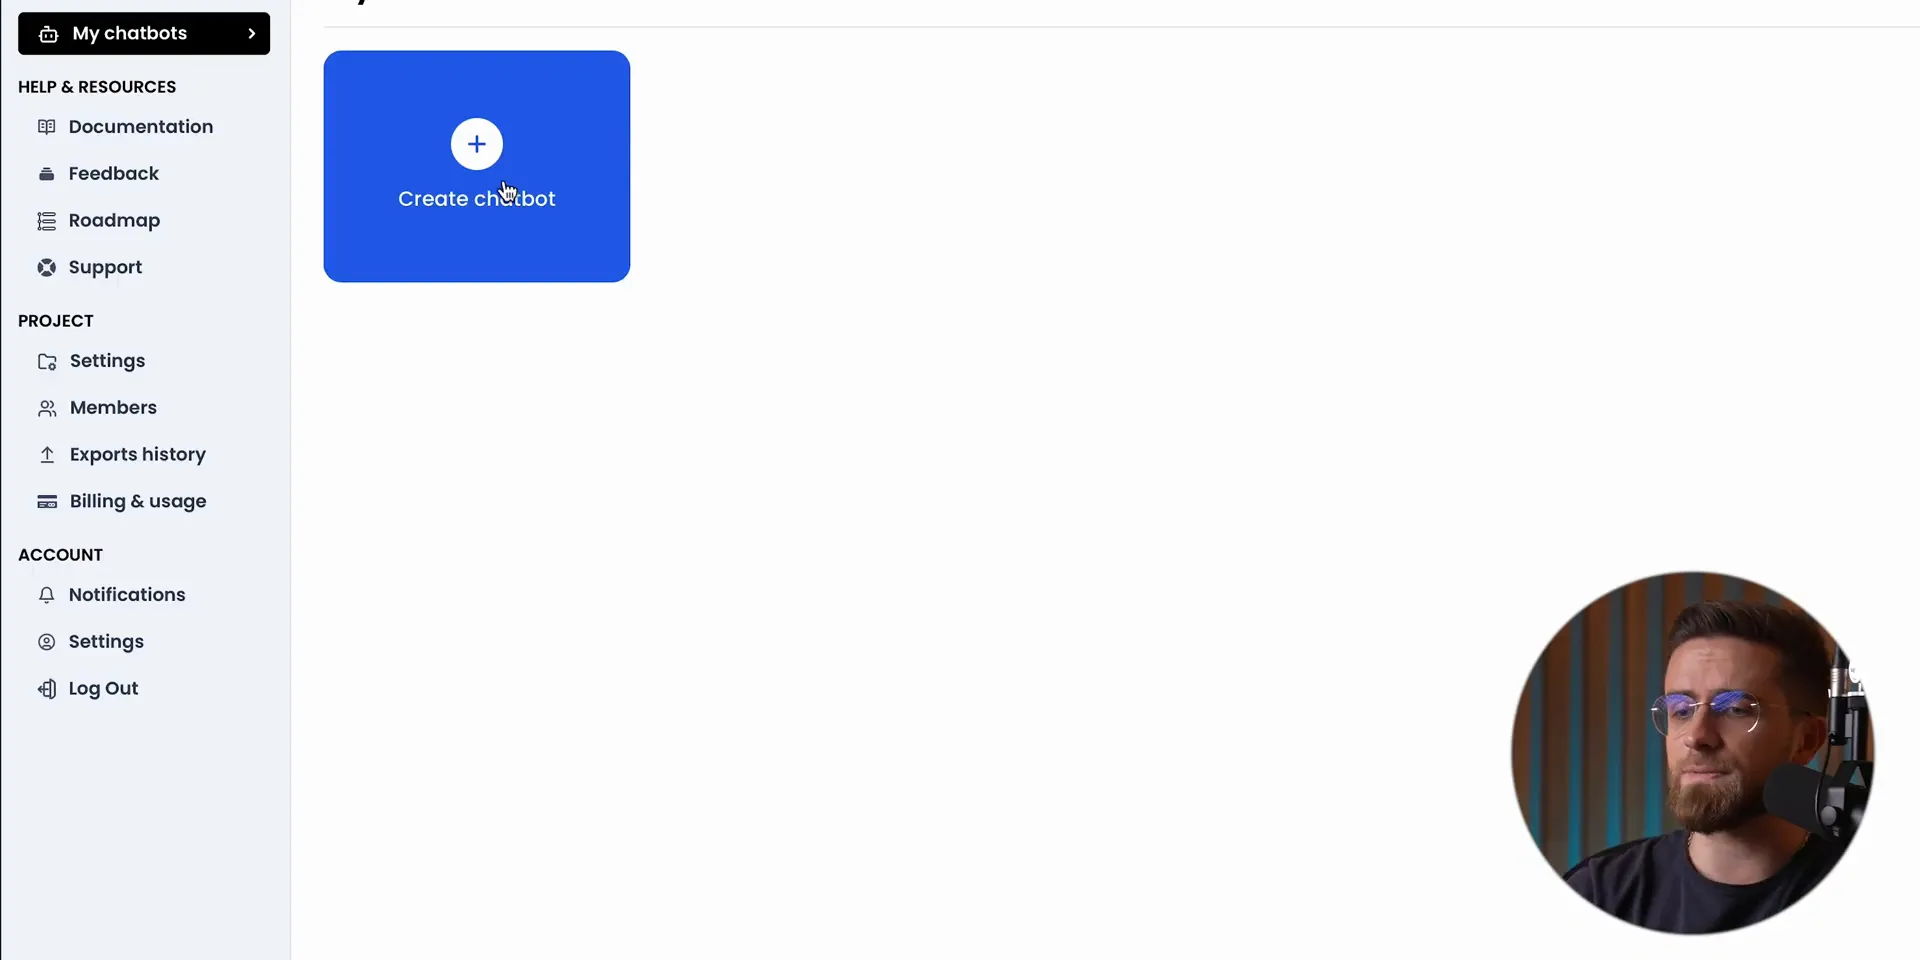
🤖 Choosing Your Chatbot Type
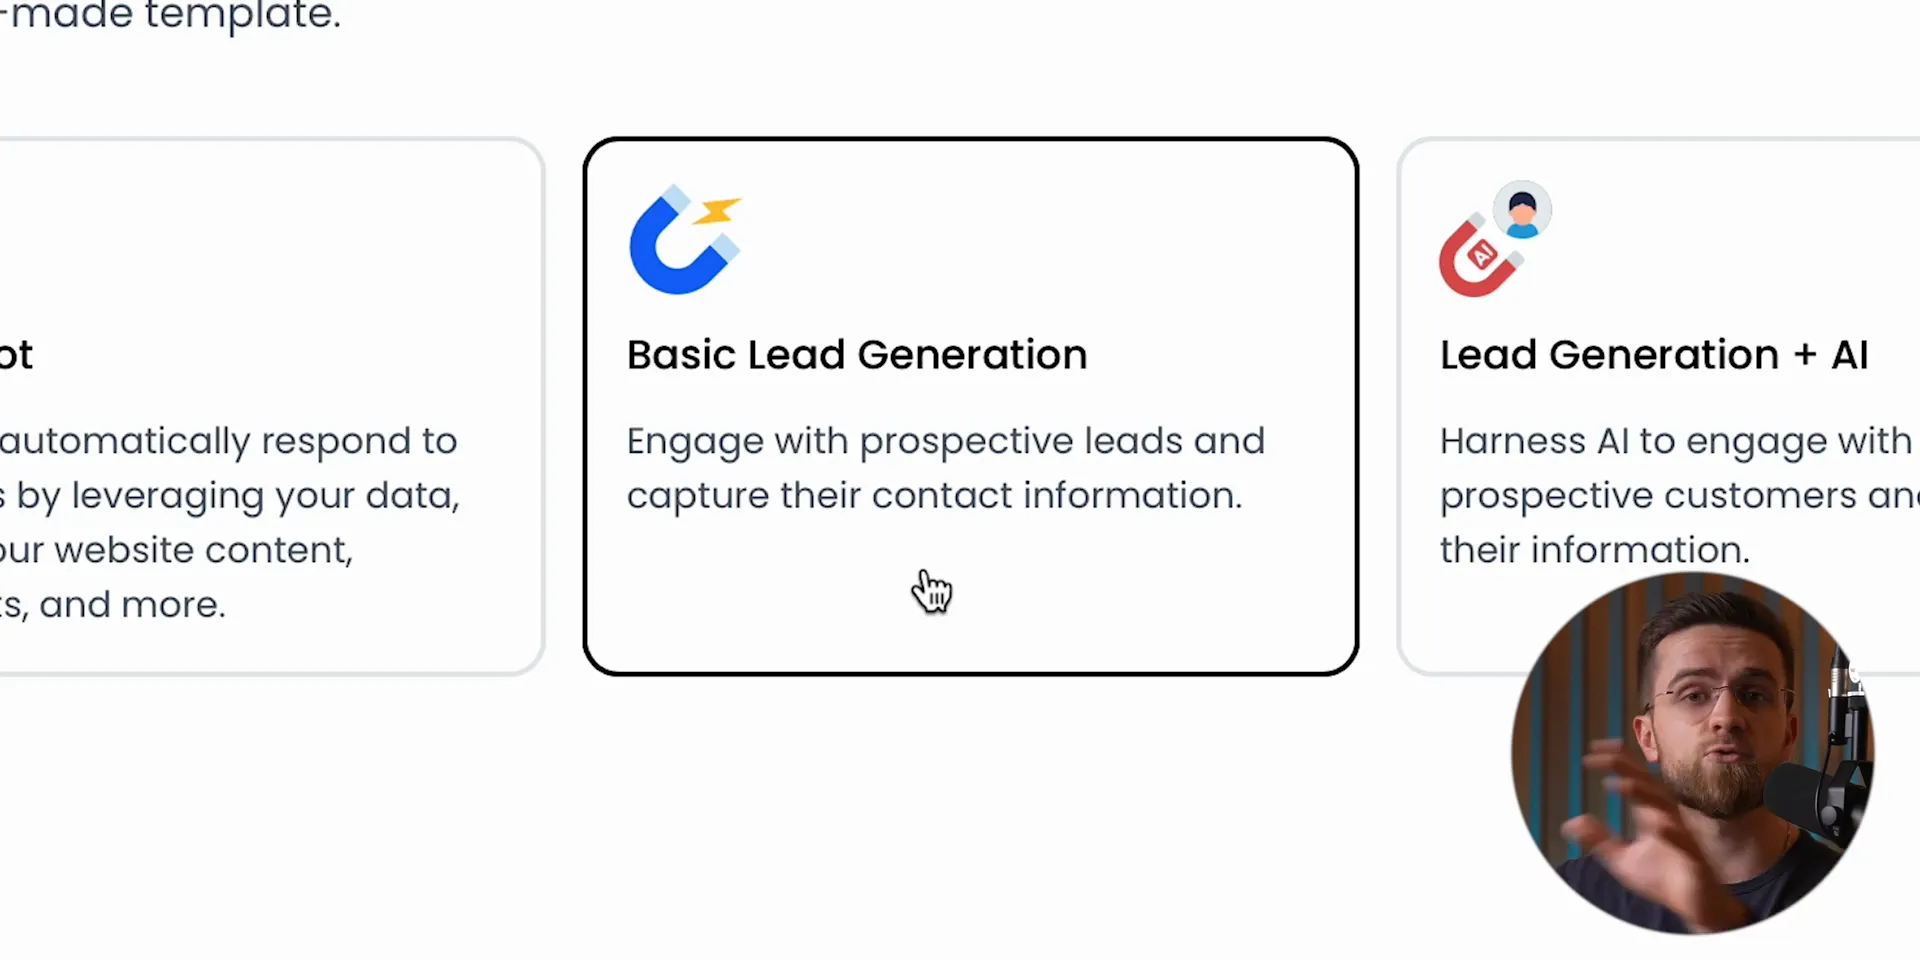
Before diving into the nitty-gritty, let’s talk about the different types of chatbots you can create with Chatlink. Each type serves a specific purpose, so it’s crucial to pick the right one for your needs.
AI Chatbot: Perfect for handling customer interactions automatically. It pulls info from your website, documents, or any data you have at hand.
Basic Lead Generation: A straightforward option that collects contact info from potential customers. Great for starting conversations, but don’t expect any AI wizardry here!
AI Lead Generation: The smarter sibling that personalizes and automates the lead generation process. Engage leads without lifting a finger!
From Scratch: Want complete control? Build your chatbot from the ground up! Customize it to reflect your brand’s voice and style.
Choosing the right type is key to maximizing your chatbot’s effectiveness. Think about what you want your chatbot to achieve and select accordingly.
🛠️ Diving into Builder Mode
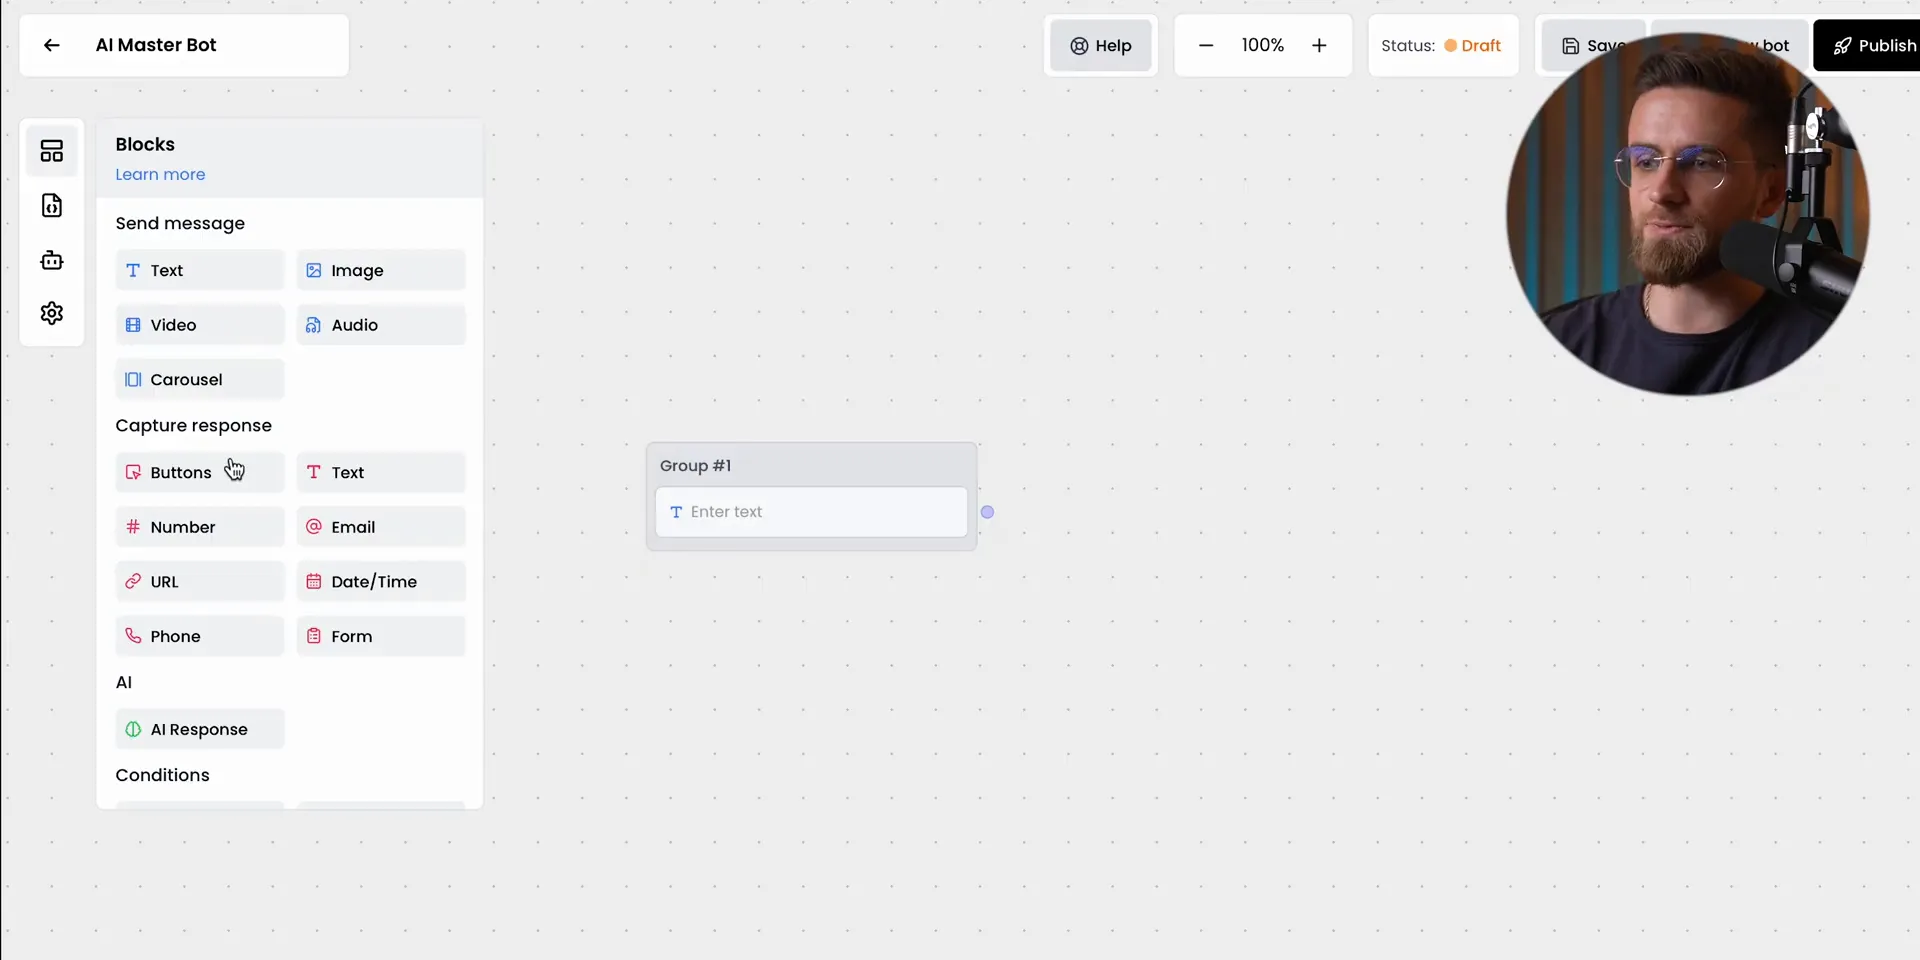
Ready to create your chatbot? Let’s jump into Builder Mode, where the magic happens! You’ll see a clean canvas in front of you, ready to be filled with all the chatbot goodness. The interface is intuitive—just drag and drop the blocks you need.
From basic messages to response captures and AI responses, the possibilities are endless. It’s like building with Legos, but for your website! The best part? You don’t need to worry about coding—Chatlink does all the heavy lifting for you.
👋 Setting Up Your Welcome Message
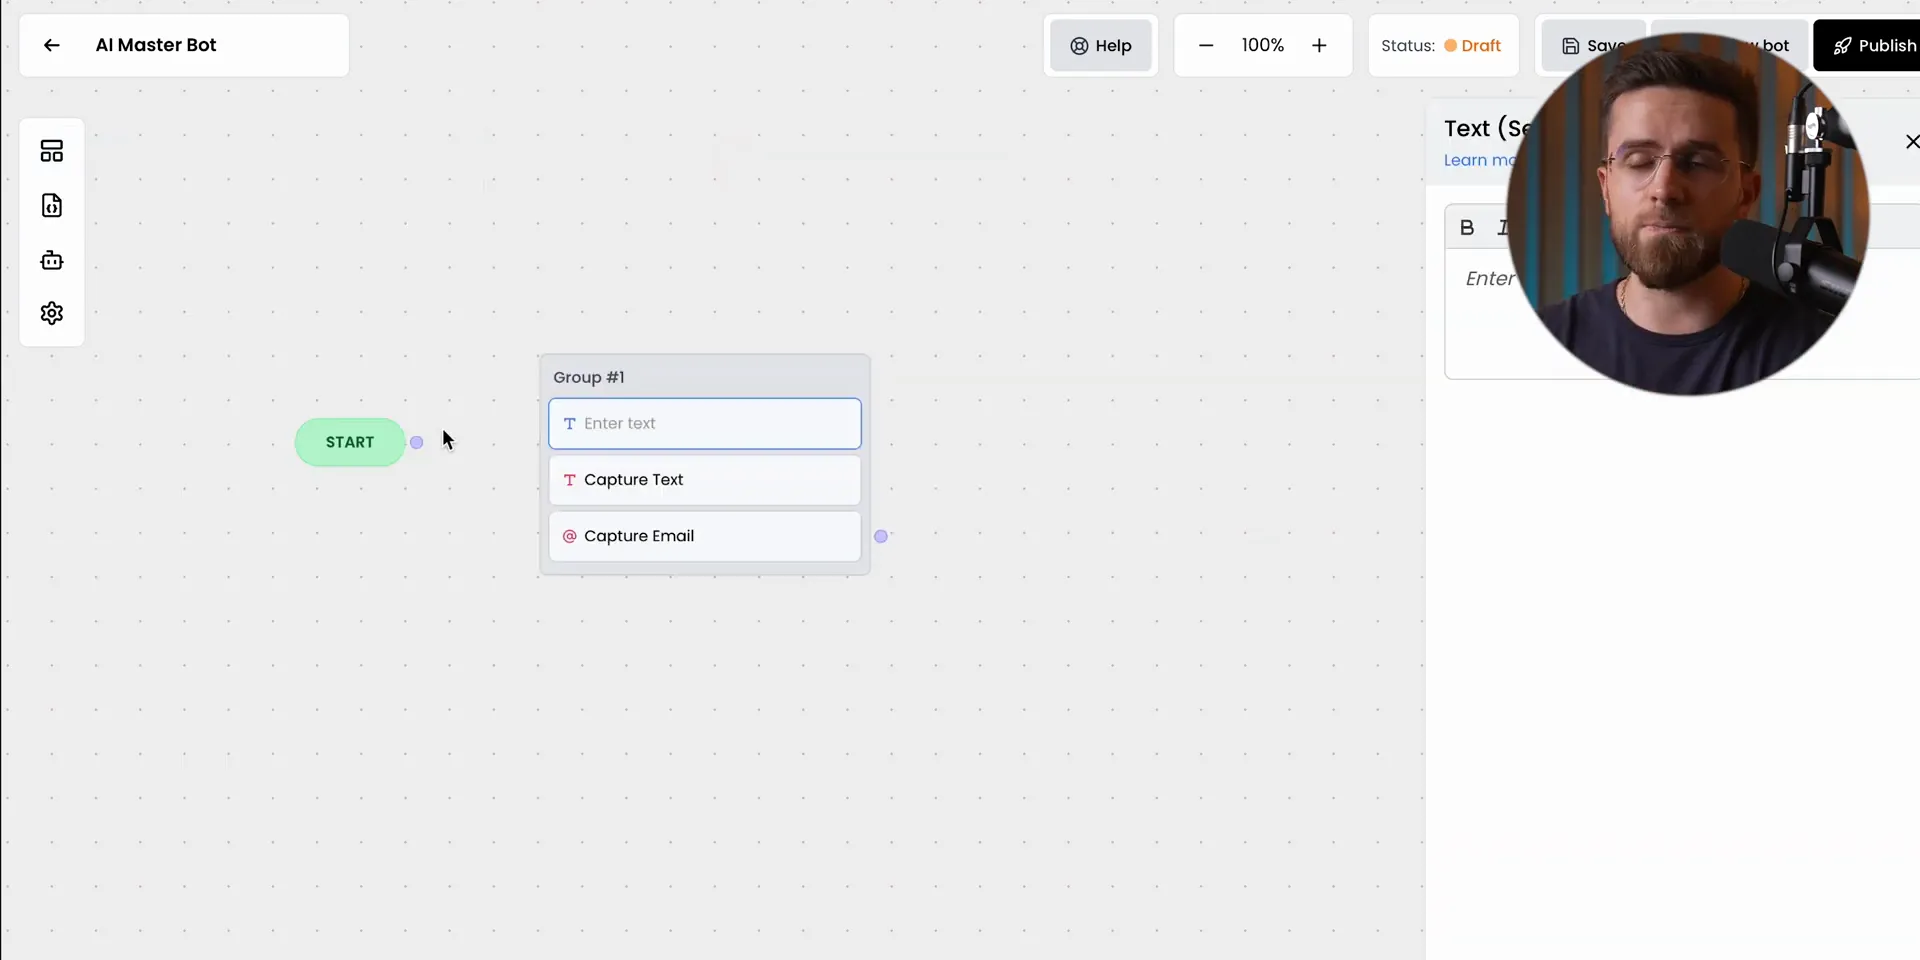
First impressions matter! Start by crafting a warm welcome message that greets visitors as soon as they land on your site. This is your chance to set the tone and engage users right off the bat.
Simply drag a message block onto the canvas and type in your welcome text. Make it friendly, inviting, and informative. Let your users know that help is just a message away!
📥 Capturing User Responses
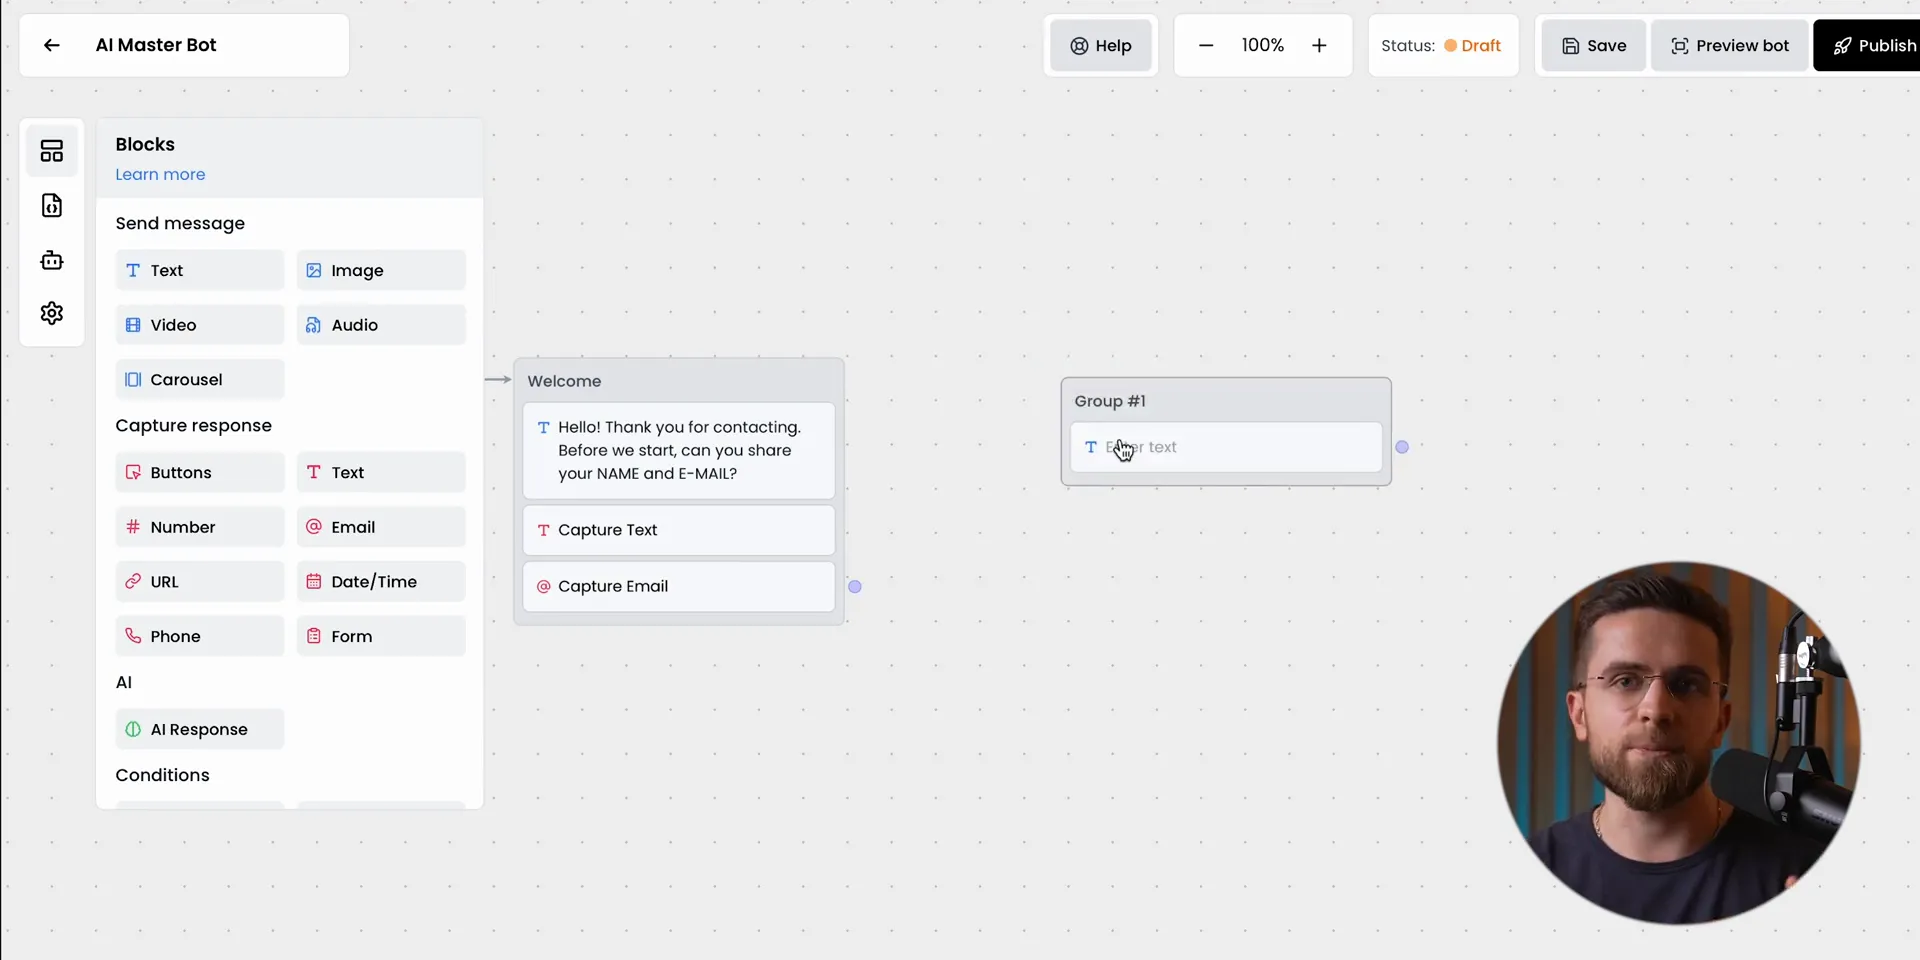
Now that you’ve set the stage, it’s time to capture user responses. This is where the real interaction begins! You want to gather valuable information, such as names and emails, to enhance your customer database.
Drag in response capture blocks and assign variables to each one. This will help you keep track of the information users provide. Want to add a twist? Enable voice input for a more interactive experience. Your users will love it!
🧠 Configuring AI Responses
Your chatbot needs to be smart! Once you’ve captured user responses, it’s time to configure the AI responses. This is where you tell your chatbot how to engage with users based on the information it receives.
Start by deciding where the AI will pull its data from—either a built-in database or one you create. Tailoring the AI’s instructions is crucial. Think about what you want the bot to do and craft prompts that guide its responses. The more specific you are, the better the interaction will be!
🔍 Choosing the Right AI Model
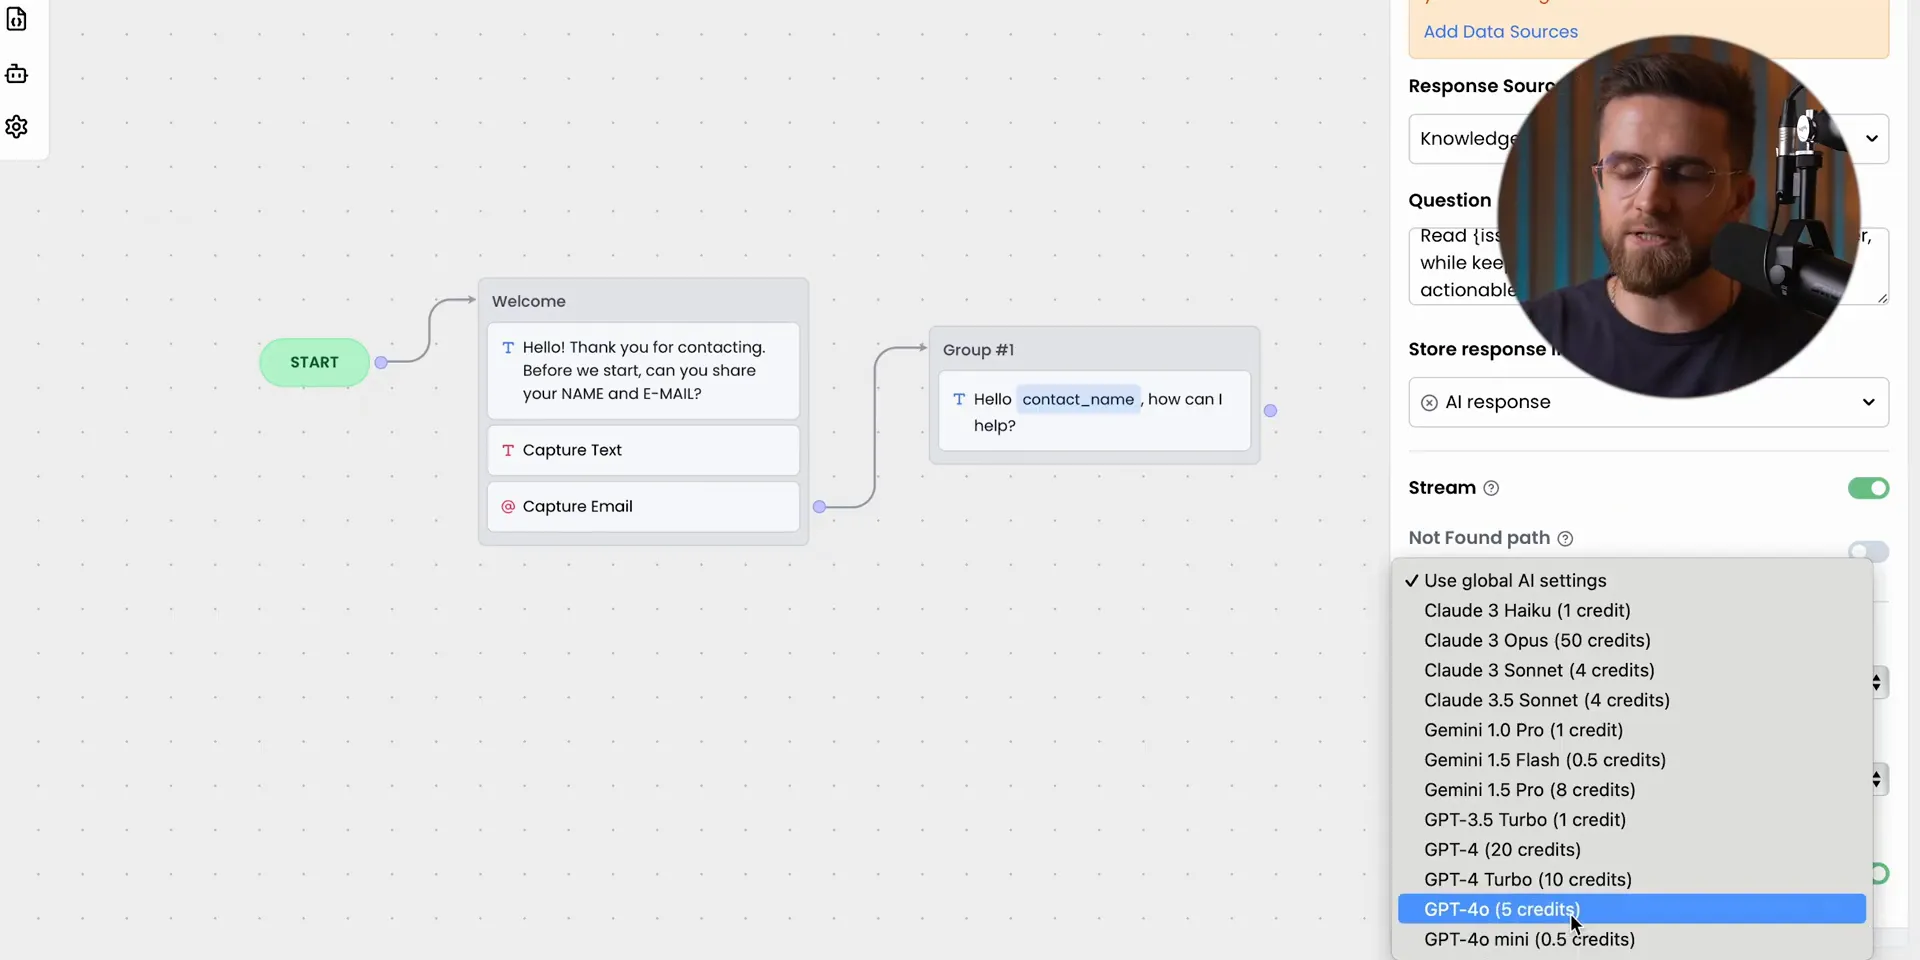
Now that you've set up your chatbot, it's time to select the AI model that best fits your needs. This step is crucial because the right model can make or break your chatbot's performance.
Chatlink offers a variety of models, each designed for different tasks. For instance, if you're looking for creativity and language-heavy tasks, Claude is your go-to. Need speed? Go for the Gemini Flash model. Want something robust for complex conversations? The GPT-4 models are top-tier!
🤔 Factors to Consider
Complexity of Tasks: If your chatbot will handle intricate queries, opt for a more advanced model.
Response Speed: Models like Gemini Flash are great for quick responses, ensuring users don’t have to wait long.
Budget: Some models cost more than others. Weigh your needs against your budget to find the best fit.
Remember, even if you choose a less expensive model, with the right training, you can still achieve impressive results!
💬 Creating Engaging Interactions
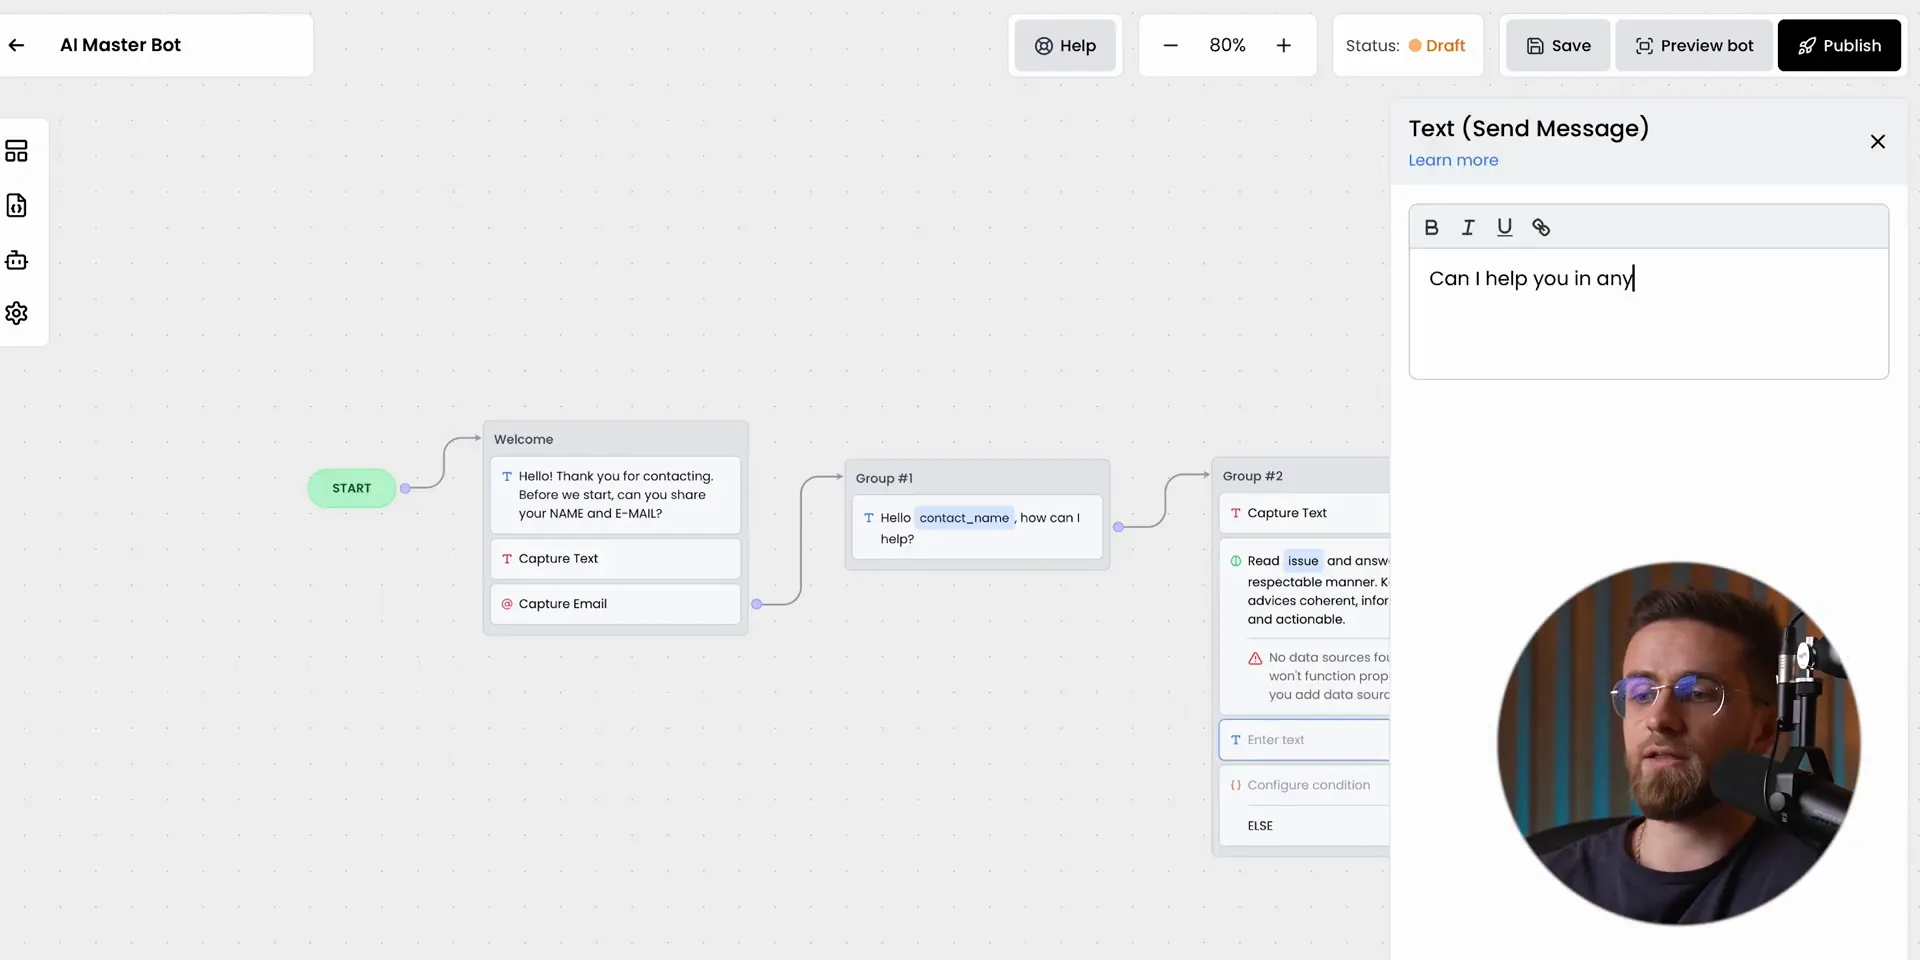
Engagement is key! If your chatbot feels robotic or generic, users will bounce faster than a rubber ball. You want your chatbot to create meaningful interactions that keep users coming back.
Start by personalizing responses based on user inputs. Use the data collected to tailor conversations. If a user mentions a specific product, have your chatbot follow up with related suggestions or offers!
✨ Tips for Engagement
Use Humor: A well-placed joke can lighten the mood and make interactions feel more human.
Ask Questions: Keep the conversation flowing by asking users about their preferences or needs.
Provide Value: Share tips, resources, or exclusive offers to enhance user experience.
By crafting engaging interactions, your chatbot becomes more than just a tool; it transforms into a valuable part of your user’s journey.
📚 Feeding Knowledge to Your Chatbot
To ensure your chatbot delivers accurate and helpful responses, you need to feed it knowledge. Think of this as giving your chatbot a brain! You can upload documents, link to websites, or even create a custom FAQ section.
Start with the knowledge base section in Chatlink. Choose how you want to load information—upload a site map, URL, or documents. You can even add text directly or set up an FAQ for quick support!
🛠️ Knowledge Sources
Website Links: Automatically pull data from your existing site.
Documents: Upload guides or manuals for detailed responses.
FAQs: Create a library of common questions and answers to streamline support.
Feeding your chatbot the right information is essential for maintaining user satisfaction and trust. The more knowledge it has, the better it can serve your audience!
🎨 Customizing Your Chatbot's Appearance
Your chatbot isn’t just a functional tool; it’s part of your brand! Customizing its appearance ensures it aligns with your website's design and enhances the overall user experience.
Head over to the appearance settings in Chatlink. Here, you can change colors, adjust the size, and even add a custom image for the chat button. The goal? Make it appealing and inviting!
🎨 Design Tips
Color Scheme: Match the chatbot colors with your brand palette for consistency.
Icon Shape: Choose shapes that fit your brand personality—round for friendly, sharp for professional.
Text Style: Use fonts that are easy to read and match your website's typography.
With these tweaks, your chatbot will not only function well but also look great doing it!
🌐 Integrating Your Chatbot into Your Website
You've built, customized, and fed your chatbot knowledge. Now it’s time for the grand finale: integration! This step is straightforward, and there are several options depending on how you want your chatbot to appear on your site.
Choose from inline chat, floating chat, or even full-screen modes. Each serves different purposes. Inline chat works great for FAQs, while floating chat is perfect for casual interactions.
🛠️ Integration Options
Floating Chat: Ideal for quick questions without interrupting the browsing experience.
Inline Chat: Great for an interactive FAQ section at the bottom of your pages.
Full-Screen Chat: Perfect for comprehensive support where users can dive deep into inquiries.
Simply copy the integration code provided by Chatlink and follow the guidelines for seamless installation. Your chatbot is now live and ready to engage users!
🚀 Final Thoughts: Embrace the Future of User Engagement
Congratulations! You’ve built a fully functional AI chatbot in under 10 minutes. This isn’t just a win for you; it’s a win for your users, too. With instant support, personalized interactions, and engaging experiences, your website is now a powerhouse of user engagement.
Don’t forget to fine-tune your chatbot regularly. Monitor interactions, gather feedback, and make adjustments as needed. The more you refine it, the better it will serve your audience.
So, what are you waiting for? Embrace the future of user engagement and watch your website transform into a vibrant hub of interaction. Your visitors will thank you for it!
Ready to transform your website with a custom AI chatbot? In this blog, we'll guide you through a step-by-step process to build your very own chatbot using Chatling, making your site more interactive and user-friendly—all without a single line of code!
💻 Why Your Website Needs an Upgrade
Your website is your digital storefront. If it’s outdated, you’re losing potential customers faster than you can say “click away.” A fresh, modern look paired with interactive features can keep users engaged. Plus, who wants to be the brand with a website that feels like it’s stuck in the early 2000s?
Think about it: users expect instant answers and smooth experiences. If they land on a site that’s clunky or hard to navigate, they’re outta there! Upgrading your website with a chatbot not only enhances the user experience but also boosts your credibility. It’s about time you give your visitors what they deserve—a seamless, engaging experience that keeps them coming back for more.

🚀 Introducing Chatlink
Meet Chatlink, the game-changer in the world of chatbots! This platform is designed to empower you to create advanced AI chatbots without writing a single line of code. Yep, you heard that right! With Chatlink, you can build a chatbot that fits your unique business needs in under ten minutes. It’s like having your own personal assistant, available 24/7, ready to engage with your customers.
Why settle for basic when you can have advanced? Chatlink allows you to automate customer support, lead generation, marketing, and so much more. The best part? You can integrate it seamlessly into any website. So, whether you’re a small business or a large corporation, Chatlink has your back!

🤖 Choosing Your Chatbot Type
Before diving into the nitty-gritty, let’s talk about the different types of chatbots you can create with Chatlink. Each type serves a specific purpose, so it’s crucial to pick the right one for your needs.
AI Chatbot: Perfect for handling customer interactions automatically. It pulls info from your website, documents, or any data you have at hand.
Basic Lead Generation: A straightforward option that collects contact info from potential customers. Great for starting conversations, but don’t expect any AI wizardry here!
AI Lead Generation: The smarter sibling that personalizes and automates the lead generation process. Engage leads without lifting a finger!
From Scratch: Want complete control? Build your chatbot from the ground up! Customize it to reflect your brand’s voice and style.
Choosing the right type is key to maximizing your chatbot’s effectiveness. Think about what you want your chatbot to achieve and select accordingly.

🛠️ Diving into Builder Mode
Ready to create your chatbot? Let’s jump into Builder Mode, where the magic happens! You’ll see a clean canvas in front of you, ready to be filled with all the chatbot goodness. The interface is intuitive—just drag and drop the blocks you need.
From basic messages to response captures and AI responses, the possibilities are endless. It’s like building with Legos, but for your website! The best part? You don’t need to worry about coding—Chatlink does all the heavy lifting for you.

👋 Setting Up Your Welcome Message
First impressions matter! Start by crafting a warm welcome message that greets visitors as soon as they land on your site. This is your chance to set the tone and engage users right off the bat.
Simply drag a message block onto the canvas and type in your welcome text. Make it friendly, inviting, and informative. Let your users know that help is just a message away!

📥 Capturing User Responses
Now that you’ve set the stage, it’s time to capture user responses. This is where the real interaction begins! You want to gather valuable information, such as names and emails, to enhance your customer database.
Drag in response capture blocks and assign variables to each one. This will help you keep track of the information users provide. Want to add a twist? Enable voice input for a more interactive experience. Your users will love it!

🧠 Configuring AI Responses
Your chatbot needs to be smart! Once you’ve captured user responses, it’s time to configure the AI responses. This is where you tell your chatbot how to engage with users based on the information it receives.
Start by deciding where the AI will pull its data from—either a built-in database or one you create. Tailoring the AI’s instructions is crucial. Think about what you want the bot to do and craft prompts that guide its responses. The more specific you are, the better the interaction will be!

🔍 Choosing the Right AI Model
Now that you've set up your chatbot, it's time to select the AI model that best fits your needs. This step is crucial because the right model can make or break your chatbot's performance.
Chatlink offers a variety of models, each designed for different tasks. For instance, if you're looking for creativity and language-heavy tasks, Claude is your go-to. Need speed? Go for the Gemini Flash model. Want something robust for complex conversations? The GPT-4 models are top-tier!

🤔 Factors to Consider
Complexity of Tasks: If your chatbot will handle intricate queries, opt for a more advanced model.
Response Speed: Models like Gemini Flash are great for quick responses, ensuring users don’t have to wait long.
Budget: Some models cost more than others. Weigh your needs against your budget to find the best fit.
Remember, even if you choose a less expensive model, with the right training, you can still achieve impressive results!
💬 Creating Engaging Interactions
Engagement is key! If your chatbot feels robotic or generic, users will bounce faster than a rubber ball. You want your chatbot to create meaningful interactions that keep users coming back.
Start by personalizing responses based on user inputs. Use the data collected to tailor conversations. If a user mentions a specific product, have your chatbot follow up with related suggestions or offers!

✨ Tips for Engagement
Use Humor: A well-placed joke can lighten the mood and make interactions feel more human.
Ask Questions: Keep the conversation flowing by asking users about their preferences or needs.
Provide Value: Share tips, resources, or exclusive offers to enhance user experience.
By crafting engaging interactions, your chatbot becomes more than just a tool; it transforms into a valuable part of your user’s journey.
📚 Feeding Knowledge to Your Chatbot
To ensure your chatbot delivers accurate and helpful responses, you need to feed it knowledge. Think of this as giving your chatbot a brain! You can upload documents, link to websites, or even create a custom FAQ section.
Start with the knowledge base section in Chatlink. Choose how you want to load information—upload a site map, URL, or documents. You can even add text directly or set up an FAQ for quick support!
🛠️ Knowledge Sources
Website Links: Automatically pull data from your existing site.
Documents: Upload guides or manuals for detailed responses.
FAQs: Create a library of common questions and answers to streamline support.
Feeding your chatbot the right information is essential for maintaining user satisfaction and trust. The more knowledge it has, the better it can serve your audience!
🎨 Customizing Your Chatbot's Appearance
Your chatbot isn’t just a functional tool; it’s part of your brand! Customizing its appearance ensures it aligns with your website's design and enhances the overall user experience.
Head over to the appearance settings in Chatlink. Here, you can change colors, adjust the size, and even add a custom image for the chat button. The goal? Make it appealing and inviting!
🎨 Design Tips
Color Scheme: Match the chatbot colors with your brand palette for consistency.
Icon Shape: Choose shapes that fit your brand personality—round for friendly, sharp for professional.
Text Style: Use fonts that are easy to read and match your website's typography.
With these tweaks, your chatbot will not only function well but also look great doing it!
🌐 Integrating Your Chatbot into Your Website
You've built, customized, and fed your chatbot knowledge. Now it’s time for the grand finale: integration! This step is straightforward, and there are several options depending on how you want your chatbot to appear on your site.
Choose from inline chat, floating chat, or even full-screen modes. Each serves different purposes. Inline chat works great for FAQs, while floating chat is perfect for casual interactions.
🛠️ Integration Options
Floating Chat: Ideal for quick questions without interrupting the browsing experience.
Inline Chat: Great for an interactive FAQ section at the bottom of your pages.
Full-Screen Chat: Perfect for comprehensive support where users can dive deep into inquiries.
Simply copy the integration code provided by Chatlink and follow the guidelines for seamless installation. Your chatbot is now live and ready to engage users!
🚀 Final Thoughts: Embrace the Future of User Engagement
Congratulations! You’ve built a fully functional AI chatbot in under 10 minutes. This isn’t just a win for you; it’s a win for your users, too. With instant support, personalized interactions, and engaging experiences, your website is now a powerhouse of user engagement.
Don’t forget to fine-tune your chatbot regularly. Monitor interactions, gather feedback, and make adjustments as needed. The more you refine it, the better it will serve your audience.
So, what are you waiting for? Embrace the future of user engagement and watch your website transform into a vibrant hub of interaction. Your visitors will thank you for it!
Ready to transform your website with a custom AI chatbot? In this blog, we'll guide you through a step-by-step process to build your very own chatbot using Chatling, making your site more interactive and user-friendly—all without a single line of code!
💻 Why Your Website Needs an Upgrade
Your website is your digital storefront. If it’s outdated, you’re losing potential customers faster than you can say “click away.” A fresh, modern look paired with interactive features can keep users engaged. Plus, who wants to be the brand with a website that feels like it’s stuck in the early 2000s?
Think about it: users expect instant answers and smooth experiences. If they land on a site that’s clunky or hard to navigate, they’re outta there! Upgrading your website with a chatbot not only enhances the user experience but also boosts your credibility. It’s about time you give your visitors what they deserve—a seamless, engaging experience that keeps them coming back for more.

🚀 Introducing Chatlink
Meet Chatlink, the game-changer in the world of chatbots! This platform is designed to empower you to create advanced AI chatbots without writing a single line of code. Yep, you heard that right! With Chatlink, you can build a chatbot that fits your unique business needs in under ten minutes. It’s like having your own personal assistant, available 24/7, ready to engage with your customers.
Why settle for basic when you can have advanced? Chatlink allows you to automate customer support, lead generation, marketing, and so much more. The best part? You can integrate it seamlessly into any website. So, whether you’re a small business or a large corporation, Chatlink has your back!

🤖 Choosing Your Chatbot Type
Before diving into the nitty-gritty, let’s talk about the different types of chatbots you can create with Chatlink. Each type serves a specific purpose, so it’s crucial to pick the right one for your needs.
AI Chatbot: Perfect for handling customer interactions automatically. It pulls info from your website, documents, or any data you have at hand.
Basic Lead Generation: A straightforward option that collects contact info from potential customers. Great for starting conversations, but don’t expect any AI wizardry here!
AI Lead Generation: The smarter sibling that personalizes and automates the lead generation process. Engage leads without lifting a finger!
From Scratch: Want complete control? Build your chatbot from the ground up! Customize it to reflect your brand’s voice and style.
Choosing the right type is key to maximizing your chatbot’s effectiveness. Think about what you want your chatbot to achieve and select accordingly.

🛠️ Diving into Builder Mode
Ready to create your chatbot? Let’s jump into Builder Mode, where the magic happens! You’ll see a clean canvas in front of you, ready to be filled with all the chatbot goodness. The interface is intuitive—just drag and drop the blocks you need.
From basic messages to response captures and AI responses, the possibilities are endless. It’s like building with Legos, but for your website! The best part? You don’t need to worry about coding—Chatlink does all the heavy lifting for you.

👋 Setting Up Your Welcome Message
First impressions matter! Start by crafting a warm welcome message that greets visitors as soon as they land on your site. This is your chance to set the tone and engage users right off the bat.
Simply drag a message block onto the canvas and type in your welcome text. Make it friendly, inviting, and informative. Let your users know that help is just a message away!

📥 Capturing User Responses
Now that you’ve set the stage, it’s time to capture user responses. This is where the real interaction begins! You want to gather valuable information, such as names and emails, to enhance your customer database.
Drag in response capture blocks and assign variables to each one. This will help you keep track of the information users provide. Want to add a twist? Enable voice input for a more interactive experience. Your users will love it!

🧠 Configuring AI Responses
Your chatbot needs to be smart! Once you’ve captured user responses, it’s time to configure the AI responses. This is where you tell your chatbot how to engage with users based on the information it receives.
Start by deciding where the AI will pull its data from—either a built-in database or one you create. Tailoring the AI’s instructions is crucial. Think about what you want the bot to do and craft prompts that guide its responses. The more specific you are, the better the interaction will be!

🔍 Choosing the Right AI Model
Now that you've set up your chatbot, it's time to select the AI model that best fits your needs. This step is crucial because the right model can make or break your chatbot's performance.
Chatlink offers a variety of models, each designed for different tasks. For instance, if you're looking for creativity and language-heavy tasks, Claude is your go-to. Need speed? Go for the Gemini Flash model. Want something robust for complex conversations? The GPT-4 models are top-tier!

🤔 Factors to Consider
Complexity of Tasks: If your chatbot will handle intricate queries, opt for a more advanced model.
Response Speed: Models like Gemini Flash are great for quick responses, ensuring users don’t have to wait long.
Budget: Some models cost more than others. Weigh your needs against your budget to find the best fit.
Remember, even if you choose a less expensive model, with the right training, you can still achieve impressive results!
💬 Creating Engaging Interactions
Engagement is key! If your chatbot feels robotic or generic, users will bounce faster than a rubber ball. You want your chatbot to create meaningful interactions that keep users coming back.
Start by personalizing responses based on user inputs. Use the data collected to tailor conversations. If a user mentions a specific product, have your chatbot follow up with related suggestions or offers!

✨ Tips for Engagement
Use Humor: A well-placed joke can lighten the mood and make interactions feel more human.
Ask Questions: Keep the conversation flowing by asking users about their preferences or needs.
Provide Value: Share tips, resources, or exclusive offers to enhance user experience.
By crafting engaging interactions, your chatbot becomes more than just a tool; it transforms into a valuable part of your user’s journey.
📚 Feeding Knowledge to Your Chatbot
To ensure your chatbot delivers accurate and helpful responses, you need to feed it knowledge. Think of this as giving your chatbot a brain! You can upload documents, link to websites, or even create a custom FAQ section.
Start with the knowledge base section in Chatlink. Choose how you want to load information—upload a site map, URL, or documents. You can even add text directly or set up an FAQ for quick support!
🛠️ Knowledge Sources
Website Links: Automatically pull data from your existing site.
Documents: Upload guides or manuals for detailed responses.
FAQs: Create a library of common questions and answers to streamline support.
Feeding your chatbot the right information is essential for maintaining user satisfaction and trust. The more knowledge it has, the better it can serve your audience!
🎨 Customizing Your Chatbot's Appearance
Your chatbot isn’t just a functional tool; it’s part of your brand! Customizing its appearance ensures it aligns with your website's design and enhances the overall user experience.
Head over to the appearance settings in Chatlink. Here, you can change colors, adjust the size, and even add a custom image for the chat button. The goal? Make it appealing and inviting!
🎨 Design Tips
Color Scheme: Match the chatbot colors with your brand palette for consistency.
Icon Shape: Choose shapes that fit your brand personality—round for friendly, sharp for professional.
Text Style: Use fonts that are easy to read and match your website's typography.
With these tweaks, your chatbot will not only function well but also look great doing it!
🌐 Integrating Your Chatbot into Your Website
You've built, customized, and fed your chatbot knowledge. Now it’s time for the grand finale: integration! This step is straightforward, and there are several options depending on how you want your chatbot to appear on your site.
Choose from inline chat, floating chat, or even full-screen modes. Each serves different purposes. Inline chat works great for FAQs, while floating chat is perfect for casual interactions.
🛠️ Integration Options
Floating Chat: Ideal for quick questions without interrupting the browsing experience.
Inline Chat: Great for an interactive FAQ section at the bottom of your pages.
Full-Screen Chat: Perfect for comprehensive support where users can dive deep into inquiries.
Simply copy the integration code provided by Chatlink and follow the guidelines for seamless installation. Your chatbot is now live and ready to engage users!
🚀 Final Thoughts: Embrace the Future of User Engagement
Congratulations! You’ve built a fully functional AI chatbot in under 10 minutes. This isn’t just a win for you; it’s a win for your users, too. With instant support, personalized interactions, and engaging experiences, your website is now a powerhouse of user engagement.
Don’t forget to fine-tune your chatbot regularly. Monitor interactions, gather feedback, and make adjustments as needed. The more you refine it, the better it will serve your audience.
So, what are you waiting for? Embrace the future of user engagement and watch your website transform into a vibrant hub of interaction. Your visitors will thank you for it!
Ready to transform your website with a custom AI chatbot? In this blog, we'll guide you through a step-by-step process to build your very own chatbot using Chatling, making your site more interactive and user-friendly—all without a single line of code!
💻 Why Your Website Needs an Upgrade
Your website is your digital storefront. If it’s outdated, you’re losing potential customers faster than you can say “click away.” A fresh, modern look paired with interactive features can keep users engaged. Plus, who wants to be the brand with a website that feels like it’s stuck in the early 2000s?
Think about it: users expect instant answers and smooth experiences. If they land on a site that’s clunky or hard to navigate, they’re outta there! Upgrading your website with a chatbot not only enhances the user experience but also boosts your credibility. It’s about time you give your visitors what they deserve—a seamless, engaging experience that keeps them coming back for more.

🚀 Introducing Chatlink
Meet Chatlink, the game-changer in the world of chatbots! This platform is designed to empower you to create advanced AI chatbots without writing a single line of code. Yep, you heard that right! With Chatlink, you can build a chatbot that fits your unique business needs in under ten minutes. It’s like having your own personal assistant, available 24/7, ready to engage with your customers.
Why settle for basic when you can have advanced? Chatlink allows you to automate customer support, lead generation, marketing, and so much more. The best part? You can integrate it seamlessly into any website. So, whether you’re a small business or a large corporation, Chatlink has your back!

🤖 Choosing Your Chatbot Type
Before diving into the nitty-gritty, let’s talk about the different types of chatbots you can create with Chatlink. Each type serves a specific purpose, so it’s crucial to pick the right one for your needs.
AI Chatbot: Perfect for handling customer interactions automatically. It pulls info from your website, documents, or any data you have at hand.
Basic Lead Generation: A straightforward option that collects contact info from potential customers. Great for starting conversations, but don’t expect any AI wizardry here!
AI Lead Generation: The smarter sibling that personalizes and automates the lead generation process. Engage leads without lifting a finger!
From Scratch: Want complete control? Build your chatbot from the ground up! Customize it to reflect your brand’s voice and style.
Choosing the right type is key to maximizing your chatbot’s effectiveness. Think about what you want your chatbot to achieve and select accordingly.

🛠️ Diving into Builder Mode
Ready to create your chatbot? Let’s jump into Builder Mode, where the magic happens! You’ll see a clean canvas in front of you, ready to be filled with all the chatbot goodness. The interface is intuitive—just drag and drop the blocks you need.
From basic messages to response captures and AI responses, the possibilities are endless. It’s like building with Legos, but for your website! The best part? You don’t need to worry about coding—Chatlink does all the heavy lifting for you.

👋 Setting Up Your Welcome Message
First impressions matter! Start by crafting a warm welcome message that greets visitors as soon as they land on your site. This is your chance to set the tone and engage users right off the bat.
Simply drag a message block onto the canvas and type in your welcome text. Make it friendly, inviting, and informative. Let your users know that help is just a message away!

📥 Capturing User Responses
Now that you’ve set the stage, it’s time to capture user responses. This is where the real interaction begins! You want to gather valuable information, such as names and emails, to enhance your customer database.
Drag in response capture blocks and assign variables to each one. This will help you keep track of the information users provide. Want to add a twist? Enable voice input for a more interactive experience. Your users will love it!

🧠 Configuring AI Responses
Your chatbot needs to be smart! Once you’ve captured user responses, it’s time to configure the AI responses. This is where you tell your chatbot how to engage with users based on the information it receives.
Start by deciding where the AI will pull its data from—either a built-in database or one you create. Tailoring the AI’s instructions is crucial. Think about what you want the bot to do and craft prompts that guide its responses. The more specific you are, the better the interaction will be!

🔍 Choosing the Right AI Model
Now that you've set up your chatbot, it's time to select the AI model that best fits your needs. This step is crucial because the right model can make or break your chatbot's performance.
Chatlink offers a variety of models, each designed for different tasks. For instance, if you're looking for creativity and language-heavy tasks, Claude is your go-to. Need speed? Go for the Gemini Flash model. Want something robust for complex conversations? The GPT-4 models are top-tier!

🤔 Factors to Consider
Complexity of Tasks: If your chatbot will handle intricate queries, opt for a more advanced model.
Response Speed: Models like Gemini Flash are great for quick responses, ensuring users don’t have to wait long.
Budget: Some models cost more than others. Weigh your needs against your budget to find the best fit.
Remember, even if you choose a less expensive model, with the right training, you can still achieve impressive results!
💬 Creating Engaging Interactions
Engagement is key! If your chatbot feels robotic or generic, users will bounce faster than a rubber ball. You want your chatbot to create meaningful interactions that keep users coming back.
Start by personalizing responses based on user inputs. Use the data collected to tailor conversations. If a user mentions a specific product, have your chatbot follow up with related suggestions or offers!

✨ Tips for Engagement
Use Humor: A well-placed joke can lighten the mood and make interactions feel more human.
Ask Questions: Keep the conversation flowing by asking users about their preferences or needs.
Provide Value: Share tips, resources, or exclusive offers to enhance user experience.
By crafting engaging interactions, your chatbot becomes more than just a tool; it transforms into a valuable part of your user’s journey.
📚 Feeding Knowledge to Your Chatbot
To ensure your chatbot delivers accurate and helpful responses, you need to feed it knowledge. Think of this as giving your chatbot a brain! You can upload documents, link to websites, or even create a custom FAQ section.
Start with the knowledge base section in Chatlink. Choose how you want to load information—upload a site map, URL, or documents. You can even add text directly or set up an FAQ for quick support!
🛠️ Knowledge Sources
Website Links: Automatically pull data from your existing site.
Documents: Upload guides or manuals for detailed responses.
FAQs: Create a library of common questions and answers to streamline support.
Feeding your chatbot the right information is essential for maintaining user satisfaction and trust. The more knowledge it has, the better it can serve your audience!
🎨 Customizing Your Chatbot's Appearance
Your chatbot isn’t just a functional tool; it’s part of your brand! Customizing its appearance ensures it aligns with your website's design and enhances the overall user experience.
Head over to the appearance settings in Chatlink. Here, you can change colors, adjust the size, and even add a custom image for the chat button. The goal? Make it appealing and inviting!
🎨 Design Tips
Color Scheme: Match the chatbot colors with your brand palette for consistency.
Icon Shape: Choose shapes that fit your brand personality—round for friendly, sharp for professional.
Text Style: Use fonts that are easy to read and match your website's typography.
With these tweaks, your chatbot will not only function well but also look great doing it!
🌐 Integrating Your Chatbot into Your Website
You've built, customized, and fed your chatbot knowledge. Now it’s time for the grand finale: integration! This step is straightforward, and there are several options depending on how you want your chatbot to appear on your site.
Choose from inline chat, floating chat, or even full-screen modes. Each serves different purposes. Inline chat works great for FAQs, while floating chat is perfect for casual interactions.
🛠️ Integration Options
Floating Chat: Ideal for quick questions without interrupting the browsing experience.
Inline Chat: Great for an interactive FAQ section at the bottom of your pages.
Full-Screen Chat: Perfect for comprehensive support where users can dive deep into inquiries.
Simply copy the integration code provided by Chatlink and follow the guidelines for seamless installation. Your chatbot is now live and ready to engage users!
🚀 Final Thoughts: Embrace the Future of User Engagement
Congratulations! You’ve built a fully functional AI chatbot in under 10 minutes. This isn’t just a win for you; it’s a win for your users, too. With instant support, personalized interactions, and engaging experiences, your website is now a powerhouse of user engagement.
Don’t forget to fine-tune your chatbot regularly. Monitor interactions, gather feedback, and make adjustments as needed. The more you refine it, the better it will serve your audience.
So, what are you waiting for? Embrace the future of user engagement and watch your website transform into a vibrant hub of interaction. Your visitors will thank you for it!

